
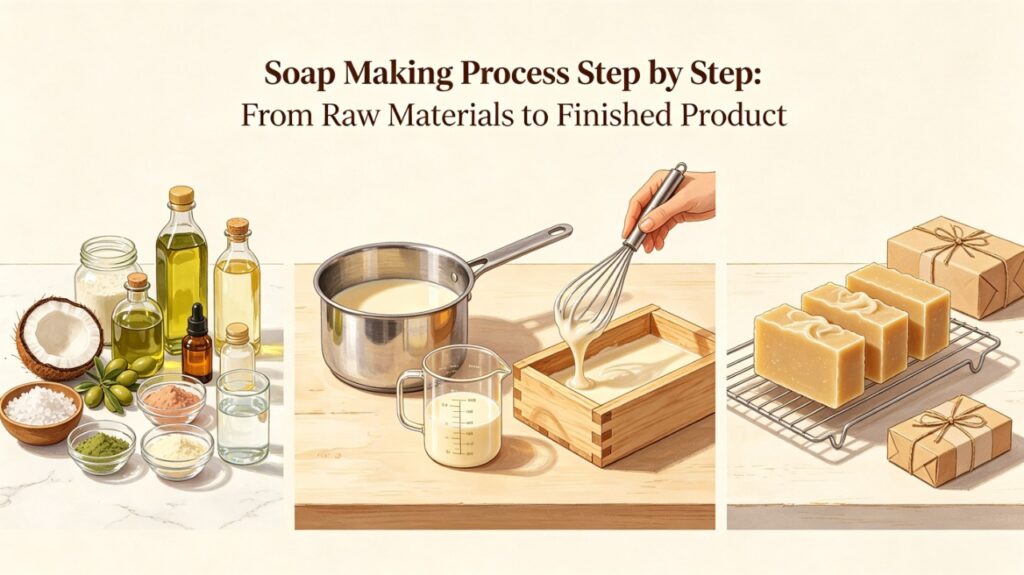
Soap making is a perfect combination of science and craftsmanship, relying on the chemical reaction called saponification to turn simple natural raw materials into mild, cleansing, and nourishing soap bars. Whether for daily household use or handmade artisanal products, the complete soap making process follows standardized, rigorous steps. This article will break down the entire workflow from raw material selection and preparation to final finished product packaging, explaining every key operation and core principle in detail.
Step 1: Select and Prepare Raw Materials
The quality of soap is fundamentally determined by raw materials. High-quality, properly matched ingredients ensure mild cleansing power, rich lather, and skin-friendly properties. The core raw materials for traditional cold-process soap making, the most common handmade soap technique, include base oils, lye solution, and functional additives.
Base oils are the main source of soap formation. Classic choices include coconut oil, olive oil, palm oil, and sweet almond oil. Coconut oil provides dense and rich lather and strong cleansing ability; olive oil endows soap with moisturizing and soothing effects, suitable for sensitive skin; palm oil helps the soap harden and extend its service life. It is necessary to accurately weigh the oils according to a fixed formula, as arbitrary proportion changes will affect the soap’s hardness, foaming performance and mildness.
Lye, mainly sodium hydroxide for solid soap, is the key alkali that triggers saponification. It must be food-grade or cosmetic-grade with high purity to avoid impurities irritating the skin. Pure water, usually distilled or deionized water, is used to dissolve lye. Tap water is not recommended because mineral impurities will affect the chemical reaction.
Optional functional additives enrich the soap’s efficacy and appearance. Skin-safe essential oils and fragrance oils add natural aromas; natural colorants like cocoa powder, matcha powder and clay create diverse colors; exfoliants such as ground oatmeal and lavender buds enhance the cleaning and skincare effects. All additives must be skin-friendly and non-irritating to ensure safe use.
Step 2: Prepare Lye Solution and Melt Oils
Temperature and operation standardization are critical in this step, directly affecting the smooth progress of saponification. First, prepare the lye solution in a well-ventilated environment. Slowly pour the weighed sodium hydroxide solid into pure water, and stir continuously with a stainless steel spoon until it is completely dissolved. It is crucial to follow the rule of adding lye to water, never water to lye to prevent high-temperature splashing and chemical burns. The lye solution will release a lot of heat during dissolution, so it needs to be placed in a cool place to cool down naturally.
Meanwhile, melt the mixed base oils. Pour the weighed solid oils and liquid oils into a stainless steel container, heat them gently with water bath or low fire until all solid oils are completely melted, then turn off the heat to cool. Wait until both the lye solution and the oil mixture cool to the optimal temperature range of 100–120°F (38–49°C), which is the most suitable temperature for full saponification and avoids damaging subsequent additive ingredients.
Step 3: Mix Materials and Stir to Trace State
When the two raw materials reach the consistent temperature, slowly pour the cooled lye solution into the oil mixture, avoiding rapid pouring to prevent local overheating. Initially, stir manually in a clockwise direction to fully fuse the oil and lye. After preliminary mixing, use a handheld stick blender for intermittent stirring to speed up the reaction.
Stir continuously until the soap liquid reaches the trace state, a key judgment standard in soap making. At this state, the soap liquid becomes thick and creamy. When you lift the blender and drizzle the liquid on the surface, it will leave temporary visible traces that slowly disappear. This means the saponification reaction has entered a stable stage, and it is time to add functional additives.
Turn off the blender, pour in essential oils, colorants or exfoliants in proportion, and stir gently and evenly with a spoon. Excessive stirring is forbidden at this stage to prevent the soap liquid from separating or generating excessive air bubbles, which will affect the appearance and quality of the finished soap.
Step 4: Pour into Molds and Insulate Solidification
After the additives are fully mixed evenly, pour the thick soap batter into clean, dry plastic or wooden soap molds. Pour slowly along the mold wall to reduce air bubbles. After pouring, gently tap the bottom of the mold on the desktop several times to release the tiny air bubbles trapped inside, making the internal texture of the soap compact and uniform without hollow holes.
Cover the mold with a clean towel or cardboard for thermal insulation and sealing. The insulation environment can maintain a stable temperature, promote the continuous progress of saponification, and prevent the soap from cracking or blooming due to temperature difference. Place the mold in a cool, dry and dust-free environment without moving or shaking it. Let it stand for 24 to 48 hours until the soap is completely solidified and shaped.
Step 5: Demold, Cut and Trim
After 1–2 days of standing and solidification, the soap will become firm and dry, meeting the demolding standard. Gently push the bottom of the mold or peel off the mold edge to take out the whole piece of soap. If the soap is still soft and sticky, extend the standing time appropriately to avoid deformation during demolding.
Take out the whole soap block and place it on a clean cutting board. Use a professional soap cutter or sharp knife to cut it into uniform square or rectangular soap bars according to the required size. After cutting, trim the irregular edges and corners to make each soap bar neat and beautiful. Remove defective products with cracks, holes or uneven texture to ensure the consistency of finished products.
Step 6: Long-term Curing Treatment
Curing is the most critical post-processing step to turn semi-finished soap into usable finished products, and it is also the step that most beginners ignore. The newly cut soap still contains residual water and unreacted trace lye, with strong alkalinity and insufficient hardness, which will cause dry and tight skin after use.
Place the cut soap bars flat on a breathable drying rack, and arrange them at intervals to ensure air circulation on all sides. Put them in a cool, dry, well-ventilated place away from direct sunlight, high temperature and humidity. The standard curing cycle is 4–6 weeks. During this period, the residual water in the soap will evaporate slowly, the alkalinity will be completely neutralized, and the saponification reaction will be fully completed.
After curing, the soap bar will become hard and durable, with mild pH value, fine and dense foam, and stable cleansing and moisturizing effects, reaching the safe use standard.
Step 7: Final Inspection and Packaging
After the curing cycle is over, conduct a comprehensive quality inspection on the soap bars. Check the appearance for cracks, discoloration, mildew and other defects; test the hardness and surface smoothness; confirm the pH value is within the safe skin-friendly range. Screen out qualified products and eliminate unqualified defective products.
Qualified finished soaps can be packaged as needed. Use breathable soap packaging paper, cartons or sealed packaging bags to isolate dust and moisture, avoid secondary contamination, and lock the aroma and efficacy of the soap. Mark the production date, shelf life and ingredient information on the packaging to complete the entire soap making process from raw materials to finished products.
Conclusion
Soap making is a delicate process that combines precise chemical reactions and careful manual operation. From scientific raw material proportioning, standardized mixing and stirring, to slow solidification and long-term curing, every step determines the quality of the final soap. Strictly following the step-by-step production process can not only ensure the safety and usability of the soap, but also make each handmade soap have stable quality, mild performance and unique natural characteristics, realizing the perfect transformation from ordinary raw materials to practical and exquisite daily necessities.